Welcome to DU!
The truly grassroots left-of-center political community where regular people, not algorithms, drive the discussions and set the standards.
Join the community:
Create a free account
Support DU (and get rid of ads!):
Become a Star Member
Latest Breaking News
Editorials & Other Articles
General Discussion
The DU Lounge
All Forums
Issue Forums
Culture Forums
Alliance Forums
Region Forums
Support Forums
Help & Search
Cooking & Baking
Related: About this forumMarcella Hazan's "Engagement Chicken" 🌞
**Roast Chicken with Lemons
FOR 4 SERVINGS
If this were a still life its title could be “Chicken with Two
Lemons.” That is all that there is in it. No fat to cook with, no
basting to do, no stuffing to prepare, no condiments except for
salt and pepper. After you put the chicken in the oven you turn it
just once. The bird, its two lemons, and the oven do all the rest.
Again and again, through the years, I meet people who come up
to me to say, “I have made your chicken with two lemons and it
is the most amazingly simple recipe, the juiciest, best-tasting
chicken I have ever had.” And you know, it is perfectly true.
A 3- to 4-pound chicken
Salt
Black pepper, ground fresh from the mill
2 rather small lemons
1. Preheat oven to 350°.
2. Wash the chicken thoroughly in cold water, both inside and
out. Remove all the bits of fat hanging loose. Let the bird sit
for about 10 minutes on a slightly tilted plate to let all the
water drain out of it. Pat it thoroughly dry all over with cloth or
paper towels.
3. Sprinkle a generous amount of salt and black pepper on the
chicken, rubbing it with your fingers over all its body and into
its cavity.
4. Wash the lemons in cold water and dry them with a towel.
Soften each lemon by placing it on a counter and rolling it
back and forth as you put firm downward pressure on it with
the palm of your hand. Puncture the lemons in at least 20
places each, using a sturdy round toothpick, a trussing
needle, a sharp-pointed fork, or similar implement.
5. Place both lemons in the bird’s cavity. Close up the opening
with toothpicks or with trussing needle and string. Close it well,
but don’t make an absolutely airtight job of it because the chicken
may burst. Run kitchen string from one leg to the other, tying it
at both knuckle ends. Leave the legs in their natural position
without pulling them tight. If the skin is unbroken, the chicken
will puff up 'as it cooks, and the string serves only to keep the
thighs from spreading apart and splitting the skin.
6. Put the chicken into a roasting pan, breast facing down. Do not
add cooking fat of any kind. This bird is self-basting, so you need
not fear it will stick to the pan. Place it in the upper third of the
preheated oven. After 30 minutes, turn the chicken over to have
the breast face up. When turning it, try not to puncture the skin.
If kept intact, the chicken will swell like a balloon, which makes
for an arresting presentation at the table later. Do not worry too
much about it, however, because even if it fails to swell, the
flavor will not be affected.
7. Cook for another 30 to 35 minutes, then turn the oven
thermostat up to 400°, and cook for an additional 20 minutes.
Calculate between 20 and 25 minutes’ total cooking time for
each pound. There is no need to turn the chicken again.
8. Whether your bird has puffed up or not, bring it to the table
whole and leave the lemons inside until it is carved and opened.
The juices that run out are perfectly delicious. Be sure to spoon
them over the chicken slices. The lemons will have shriveled up,
but they still contain some juice; do not squeeze them, they may
squirt.
Ahead-of-time note If you want to eat it while it is warm, plan to
have it the moment it comes out of the oven. If there are leftovers,
they will be very tasty cold, kept moist with some of the cooking
juices and eaten not straight out of the refrigerator, but at room
temperature.
from "Essentials of Italian Cooking" Marcella Hazan
https://www.goodreads.com/book/show/19552.Essentials_of_Classic_Italian_Cooking
******************************************************************************
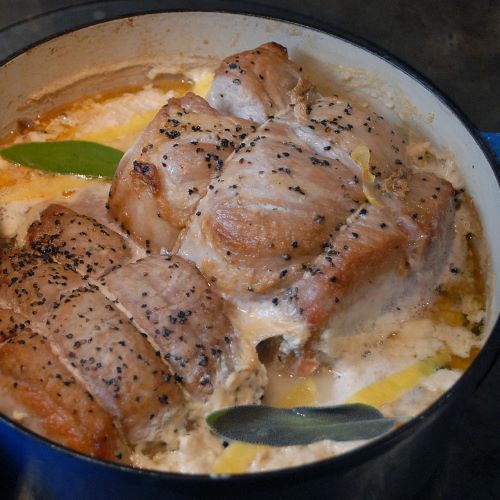
Pork Loin Braised in Milk, Bolognese Style
FOR 6 SERVINGS
If among the tens of thousands of dishes that constitute the
recorded repertory of Italian regional cooking, one were to
choose just a handful that most clearly express the genius of the
cuisine, this one would be among them. Aside from a minimal
amount of fat required to brown the meat, it has only two
components, a loin of pork and milk. As they slowly cook
together, they are transformed: The pork acquires a delicacy of
texture and flavor that leads some to mistake it for veal, and the
milk disappears to be replaced by clusters of delicious,
nut-brown sauce.
1 tablespoon butter
2 tablespoons vegetable oil
2½ pounds pork rib roast (see note below)
Salt
Black pepper, ground fresh from the mill
2½ cups, or more, whole milk
Note The cut of meat specified above includes the rib bones to
which the pork’s loin is attached. Have the butcher detach the
meat in one piece from the ribs and split the ribs into 2 or 3
parts. By having had the loin boned, you can brown it more
thoroughly, and by cooking it along with the bones, the roast
benefits from the substantial contribution of flavor the bones
make.
Another cut of pork that is well suited to this dish is the
boneless roll of muscle at the base of the neck, sometimes
known as Boston butt. There is a layer of fat in the center of
the butt that runs the length of the muscle. It makes this
cut very juicy and tasty, but when you carve it later, the slices
tend to break apart where the meat adjoins the fat. If you don’t
think this would be a problem, you ought to consider using the
butt because of its excellent flavor and juiciness. Should you
do so, substitute 2 pounds of it in one piece for the 2½-pound rib roast.
Do not have any fat trimmed away from either cut of meat. Most
of it will melt in the cooking, basting the meat and keeping it
from drying. When the roast is done, you will be able to draw it
off from the pot, and discard it.
1. Choose a heavy-bottomed pot that can later snugly
accommodate the pork, put in the butter and oil, and turn on
the heat to medium high. When the butter foam subsides, put
in the meat, the side with fat facing down at first. As it browns,
turn it, continuing to turn the meat every few moments to brown
it evenly all around. If you should find the butter becoming very
dark, lower the heat.
2. Add salt, pepper, and 1 cup of milk. Add the milk slowly lest it
boil over. Allow the milk to come to a simmer for 20 or 30
seconds, turn the heat down to minimum, and cover the pot with
the lid on slightly ajar.
3. Cook at a very lazy simmer for approximately 1 hour, turning
the meat from time to time, until the milk has thickened,
through evaporation, into a nut-brown sauce. (The exact time it
will take depends largely on the heat of your burner and the
thickness of your pot.) When the milk reaches this stage, and
not before, add 1 more cup of milk, let it simmer for about10
minutes, then cover the pot, putting the lid on tightly. Check and
turn the pork from time to time.
4. After 30 minutes, set the lid slightly ajar. Continue to cook at
minimum heat, and when you see there is no more liquid milk
in the pot, add the other ½ cup of milk. Continue cooking until
the meat feels tender when prodded with a fork and all the milk
has coagulated into small nut brown clusters. Altogether it will
take between 2½ and 3 hours. If, before the meat is fully cooked,
you find that the liquid in the pot has evaporated, add another
½ cup of milk, repeating the step if it should become necessary.
5. When the pork has become tender and all the milk in the pot
has thickened into dark clusters, transfer the meat to a cutting
board. Let it settle for a few minutes, then cut it into slices about
⅜ inch thick or slightly less, and arrange them on a warm serving
platter.
6. Tip the pot and spoon off most of the fat—there may be as
much as a cup of it—being careful to leave behind all the
coagulated milk clusters. Add 2 or 3 tablespoons of water,
and boil away the water over high heat while using a wooden
spoon to scrape loose cooking residues from the bottom and
sides of the pot. Spoon all the pot juices over the pork and serve
immediately.
from "Essentials of Italian Cooking" Marcella Hazan
https://www.goodreads.com/book/show/19552.Essentials_of_Classic_Italian_Cooking
Had the "Chicken with Lemons" last night. There was nothing left.


**Bonus: Watch American Masters S39E06 Marcella
https://www.pbssocal.org/shows/american-masters/episodes/marcella-z0afql